My “No Filter Just Face” Flawless Foundation Routine
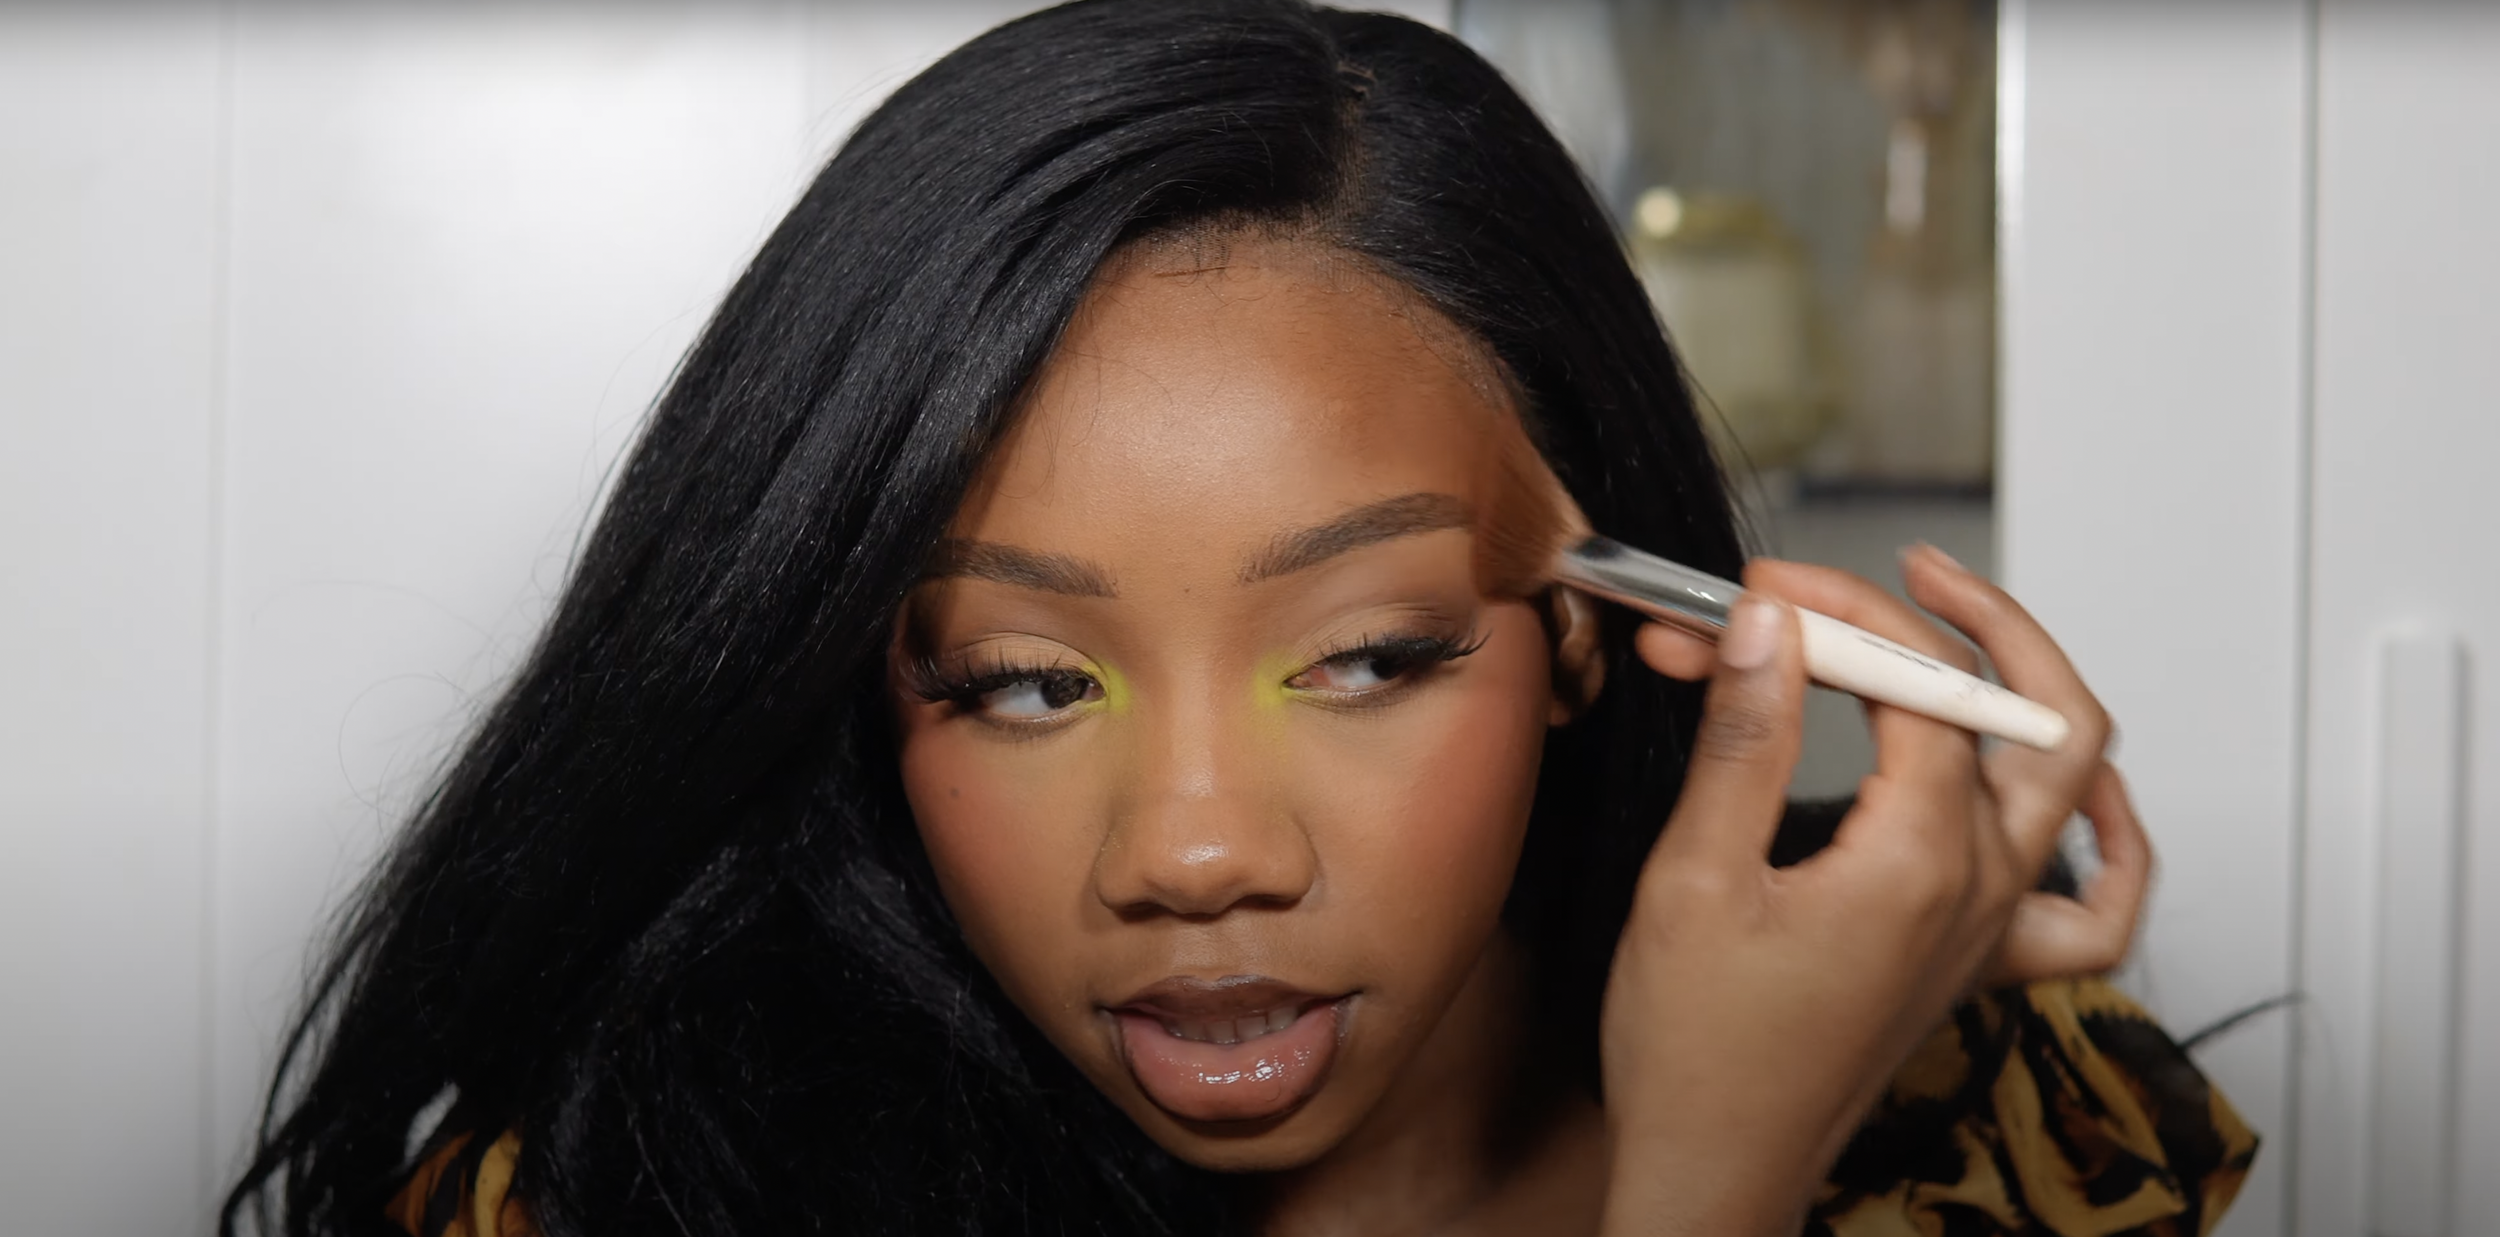
Foundation truly sets the tone (no pun intended) for your overall makeup look. I’ve perfected my routine over the years to create a smooth yet sculpted appearance. Through the techniques I’ve developed, I’ve learned the importance of achieving facial harmony by understanding my skin type, utilizing facial mapping, and using products that address my concerns. I’ve created an in-depth video tutorial explaning my techniques and showcasing my favorite products on my YouTube. You can check out the video here.
Understanding Your Skin Type
The ultimate hack to achieving your dream makeup look is understanding your skin’s nuances. Knowing which products work with your skin—by formula, shade, and undertone—plays a crucial role in creating a harmonious look.
Balancing your skin is imperative for a seamless makeup application. Whether that means applying mattifying products for oily skin, a silicone primer to alleviate texture, or an extra hydrating serum for dry or dehydrated skin, balance must be restored for a smooth base.
Facial Mapping
Artists use highlights, midtones, and shadows (values) to create dimension in their work.
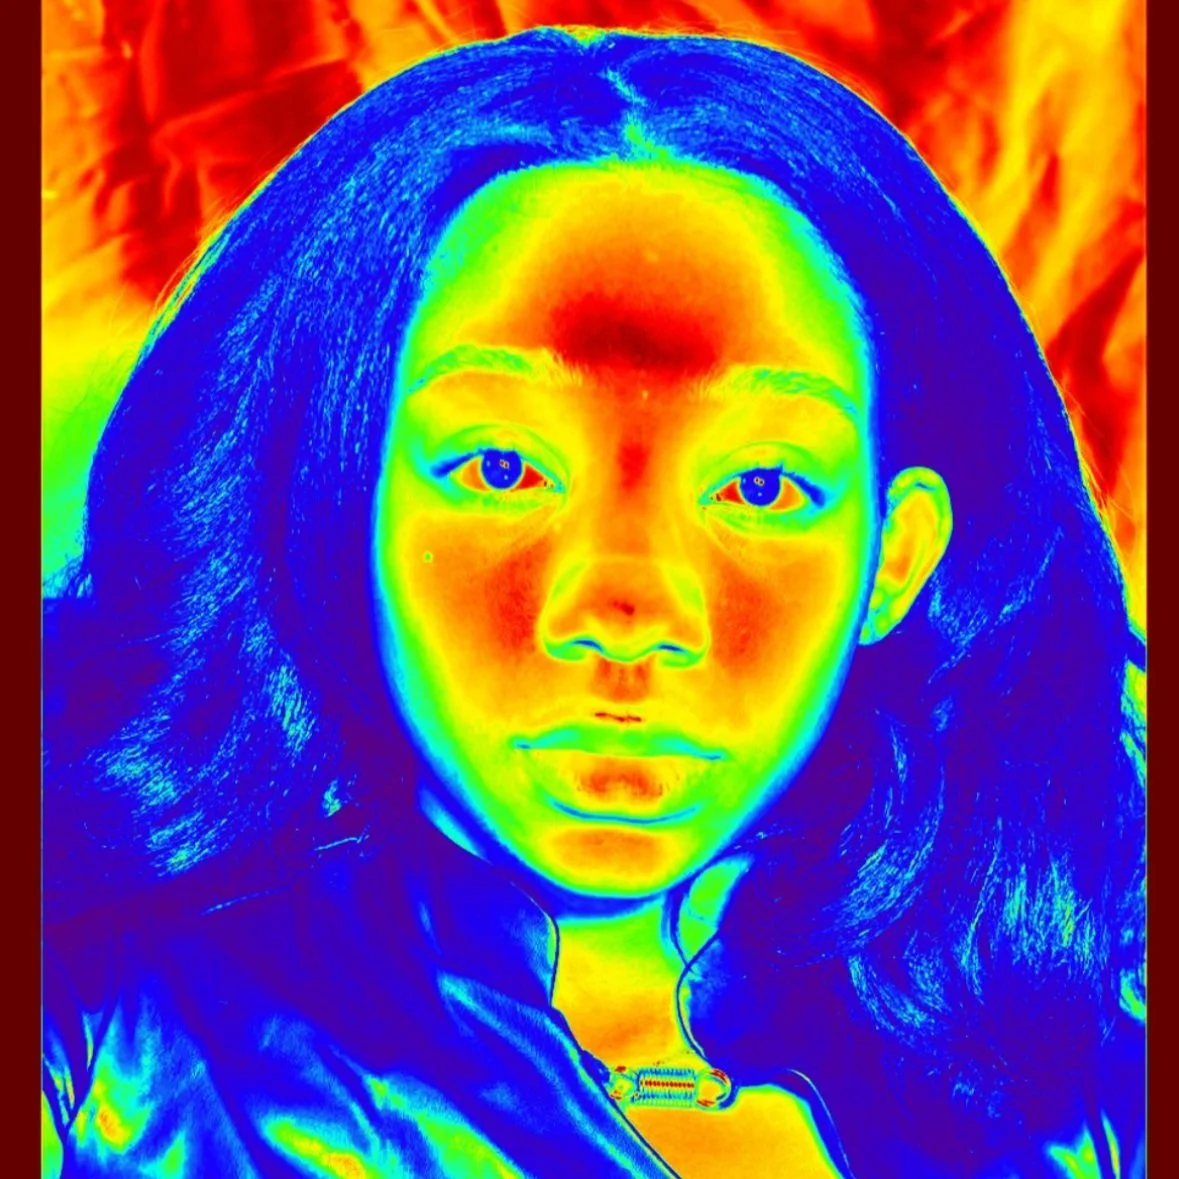
Similarly, when considering your face as a canvas, it’s essential to identify where these values naturally exist. An easy way to do this is by using photo filters that emphasize coloring. I use the Thermal Camera filter on Mac’s Photo Booth app, but you can upload a photo of yourself online (on photo editing websites such as Fotor, Tuxpi, etc.) to analyze your coloring.
I prefer using a multi-colored filter to make the values more obvious. As seen in my photo, red, yellow, orange, and green make up my face’s coloring. The color red represents highlights, green represents shadows, and orange/yellow represent midtones.
When applying makeup, you can use the red and green areas as guides for highlighting and contouring, while the orange and yellow areas serve as blending zones.
Addressing Your Concerns
As mentioned earlier, balancing your skin concerns is crucial for a seamless base. The same principle applies when evening out skin tone. Color correctors can be the unsung heroes of your makeup routine.
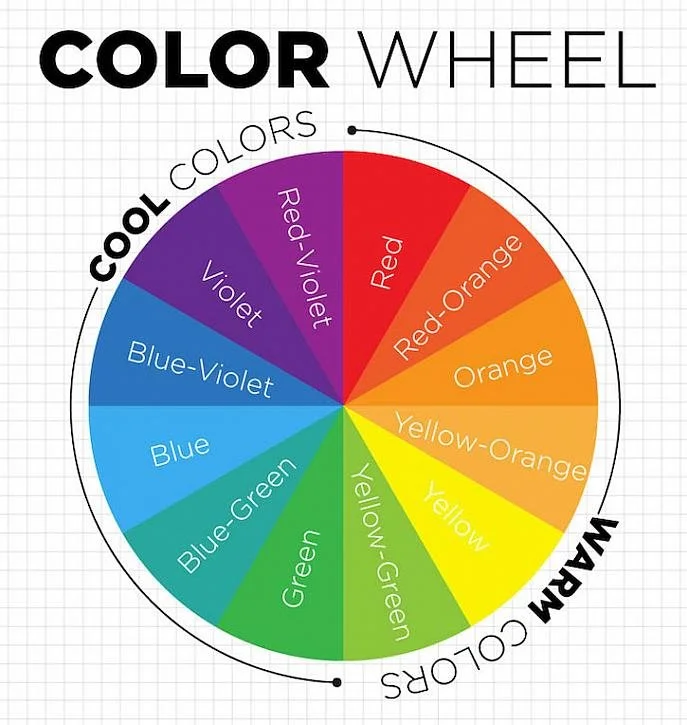
Before incorporating color correctors, even full-coverage products failed to provide an even complexion. Color correctors work by counteracting the coloring you want to conceal by introducing the opposite color on the color wheel.
For example, people dealing with redness due to irritation, a green color corrector can neutralize those tones. Similarly, orange and peach correctors can mask the blue/purple hues caused by hyperpigmentation and dark circles.
My “No Filter Just Face” Routine
First, I begin by prepping my skin for makeup. With my normal/combination skin, my primary focus is creating a hydrated canvas.
Applying skincare products is key to a flawless makeup routine. A good rule of thumb is to apply products from thinnest to thickest consistency.
In my routine, I use Good Molecules Niacinamide Brightening Toner to hydrate my skin. I follow up with The Ordinary’s Hyaluronic Acid 2% + B5 for an added moisture boost when my skin feels dry. I finish my skin prep with an SPF or moisturizer.
During the day, I apply sunscreen under my makeup to protect against UV rays. My favorites are Naturium’s Dew Glow Moisturizer with SPF 50 and Isntree’s Hyaluronic Acid Daily Sun Gel with SPF 30.
For nighttime, I use an emollient moisturizer to finish my skin prep. My all-time favorite is The Ordinary’s Natural Moisturizing Factors + Phytoceramides.
Once skin prep is complete, I apply my liquid and cream products. I start by dispensing about 1.5 pumps of foundation onto the back of my hand and buff it out with a dense buffing brush, like the Morphe M439.
I have many favorite foundations, but none compare to Haus Labs Triclone Skin Tech Foundation. This medium-to-full coverage foundation, available in 51 shades, offers the perfect satin finish without irritating my skin. I affectionately call it “doll skin in a bottle.”
Next, I begin my facial mapping process. Your highlight and contour placement should align with your facial shape and where light naturally reflects.
I use my beloved Too Faced Born This Way Concealer in Butterscotch to start what I call “the sculpt.” I apply dots under my eyes, down the center of my nose, on my forehead, and on my chin.
While that sits, I apply a concealer about three shades darker than my complexion to add dimension. Dior’s Forever Skin Correct Concealer in 7N has been my go-to for the last four years due to its full coverage and blend ability. I apply it on my temples, above my eyebrow arches, and slightly above my cheekbones to create the illusion of higher cheekbones.
A helpful technique I’ve learned from YouTube beauty gurus is to let concealer dry slightly to increase coverage. With this in mind, I blend out my contour first, allowing my highlight concealer to become tacky.
For blending contour, I prefer brushes with synthetic bristles. Some favorites include Fenty’s Bronzer Brush, ELF’s Blush Brush, and Dior’s Foundation Brush. Despite being marketed for different uses, they all have a slim base, added width in the middle, and a tapered top for precise blending.
Throughout the blending process, I use quick, repetitive tapping motions. I only move my hand up and down or side to side once I have control of the pigment placement.
Next, I blend my highlight concealer. While I’ve used sponges and brushes, I prefer a triangle powder puff to seamlessly press the product into my skin. Although I use a different tool, my blending technique remains the same. The only slight difference is that I concentrate my taps toward the center of my face and blend outward.
Once blending is complete, I immediately set the highlighted areas with translucent powder using my powder puff. My go-to is One Size Ultimate Setting Powder in Translucent, which provides a perfect blurring effect without altering the concealer’s color.
Misting your face with setting spray between layers helps prevent a cakey look. Morphe’s Continuous Setting Mist is my holy grail for refreshing my makeup.
Once my face dries, I apply REM Beauty’s Cheek and Lip Stick in Audition, a buildable, semi-matte neutral pink cream blush. I blend it with Real Techniques Setting Brush.
My remaining powder steps reinforce color lost through blending. I apply REM Beauty Hypernova Satin Matte Bronzer in Cocoa-nut around the perimeter of my face with ELF’s Bronzing Brush. I then layer a powder blush from Juvia’s Place Blushed Duo Vol. 5 using the same Real Techniques brush. Finally, I use a powder puff to apply Maybelline’s Fit Me Matte + Poreless Powder in 330 Toffee to my highlighted areas for a polished finish.
I complete my flawless foundation routine by misting setting sprays to ensure long wear throughout the day. My current favorites are NYX The Face Glue Setting Spray and One Size On ’Til Dawn Mattifying Setting Spray. And, voila! You’ve achieved the No Filter Just Face glam!
For a comprehensive list of products alongside purchase links, please check out my ShopMy storefront list here.
Links provided are affiliate links. This is not a sponsored post.

